Deepseek v3
We have added support for Deepseek v3, hosted by Fireworks AI (US). You can access it in Opper using this model name:
- fireworks/deepseek-v3
We have added support for Deepseek v3, hosted by Fireworks AI (US). You can access it in Opper using this model name:
We have added support for the following new models.
The OpperCLI now supports showing usage information for your account. This can be used to get an overview of your usage, and optionally grouped by your custom call tags.
The basic usage showing total_tokens
looks like this:
➜ opper usage list --fields=total_tokens
Usage Events:
Time Bucket: 2024-12-03T00:00:00Z
Cost: 0.029731
Count: 25
total_tokens: 4806
Time Bucket: 2024-12-04T00:00:00Z
Cost: 0.025908
Count: 13
total_tokens: 4155
Time Bucket: 2024-12-06T00:00:00Z
Cost: 0.017290
Count: 7
total_tokens: 2689
More usage information can be found by running the command:
➜ opper usage
Manage usage information
Usage:
opper usage [command]
Examples:
# List usage information
opper usage list
# List usage with time range and granularity
opper usage list --from-date=2024-01-01T00:00:00Z --to-date=2024-12-31T23:59:59Z --granularity=day
# List usage with specific fields and grouping
opper usage list --fields=completion_tokens,total_tokens --group-by=model,project.name
# Show count over time as ASCII graph (default)
opper usage list --graph
# Show cost over time as ASCII graph
opper usage list --graph=cost
# Show count over time by model
opper usage list --group-by model --graph
# Export usage as CSV
opper usage list --out csv
Tracking calls using a customer tag looks like this. First include the customer tag in the call:
opper.call(
name="my-function",
input="Hello, world!",
tags={"customer": "mycustomer"},
)
Then run the opper usage list --group-by=customer
command to see the usage information grouped by the customer tag.
➜ opper usage list --fields=total_tokens --group-by=customer
Usage Events:
Time Bucket: 2024-12-06T00:00:00Z
Cost: 0.025908
Count: 13
customer: <nil>
total_tokens: 4155
Time Bucket: 2024-12-06T00:00:00Z
Cost: 0.000007
Count: 1
customer: mycustomer
total_tokens: 23
Opper now supports running ad hoc evaluations with different models, instructions and function configurations. It works by running through a functions dataset entries and evaluating the results. This allows for testing how a function performs with current or alternative configuration.
See our documentation on Offline Evals for more information.
We have improved handling of datasets to help make it easier to populate them:
expected
field that is used in evaluations and in few shot configuration.See our documentation on Datasets for more information.
We added an llms.txt file to https://opper.ai to assist AI code editors like Cursor to find relevant documentation about Opper. See https://llmstxt.org/ for more information.
We have added support for the following new models:
gcp/gemini-exp-1114
gcp/gemini-exp-1121
mistral/pixtral-large-latest-eu
xai/grok-beta
xai/grok-vision-beta
There is now support for custom models in Opper. This means that you can bring your own key to an existing model or add a completely custom model.
The easiest way to add a model is to use the Opper CLI. The README explains how to add a model, but here is an example of adding your own Azure deployment:
opper models create example/my-gpt4 azure/gpt4-production my-api-key-here '{"api_base": "https://my-gpt4-deployment.openai.azure.com/", "api_version": "2024-06-01"}'
This adds your custom deployment on my-gpt4-deployment.openai.azure.com
and the model name gpt4-production
using the my-api-key-here
API key. This model is then accessible in Opper using the name example/my-gpt4
.
The Opper API now support providing a list of fallback models, in addition to the main model used in a call. They will be tried in order until a model returns successfully.
from opperai import Opper
opper = Opper()
response, _ = opper.call(
name="GetFirstWeekday",
input="Today is Tuesday, yesterday was Monday",
instructions="Extract the first weekday mentioned in the text",
model="azure/gpt-4o-eu",
fallback_models=["openai/gpt-4o"],
)
print(response)
from opperai import AsyncOpper
import asyncio
opper = AsyncOpper()
async def main():
response, _ = await opper.call(
name="GetFirstWeekday",
input="Today is Tuesday, yesterday was Monday",
instructions="Extract the first weekday mentioned in the text",
model="azure/gpt-4o-eu",
fallback_models=["openai/gpt-4o"],
)
print(response)
if __name__ == "__main__":
asyncio.run(main())
import OpperAI from 'opperai';
import fs from "fs";
import path from "path";
import os from "os";
async function testCallFallback() {
// Replace 'your-api-key' with your actual OpperAI API key
const client = new OpperAI({ apiKey: 'your-api-key' });
const { message, span_id } = await client.call({
name: "GetFirstWeekday",
input: "Today is Tuesday, yesterday was Monday",
instructions: "Extract the first weekday mentioned in the text",
model: "azure/gpt-4o-eu",
fallback_models: ["openai/gpt-4o"],
});
console.log(message);
}
testCallFallback();
import asyncio
from opperai import AsyncOpper
async def haiku():
aopper = AsyncOpper()
res, _ = await aopper.call(
model="anthropic/claude-3.5-haiku",
name="new-haiku-3-5",
instructions="answer the following question",
input="what are some uses of 42",
)
print(res)
asyncio.run(haiku())
With our new sidebar update, users can now effortlessly select their desired projects directly from the side panel. This improved navigation persists across indexes, traces, and functions, ensuring a seamless workflow experience.
We've upgraded our metrics display within trace spans. Users can now apply filters to better manage the metrics they need to focus on. These enhancements provide a clearer, more accessible presentation of data within the trace table.
call()
It is now possible to stream the response from the call()
method.
import asyncio
from opperai import AsyncOpper
async def stream():
aopper = AsyncOpper()
res = await aopper.call(
model="anthropic/claude-3.5-sonnet",
input="what are some uses of 42",
stream=True,
)
async for chunk in res.deltas:
print(chunk)
asyncio.run(stream())
For node sdk see examples
import asyncio
from opperai import AsyncOpper
async def sonnet():
aopper = AsyncOpper()
res, _ = await aopper.call(
model="anthropic/claude-3.5-sonnet-20241022",
name="new-sonnet-3-5",
instructions="answer the following question",
input="what are some uses of 42",
)
print(res)
asyncio.run(sonnet())
The anthropic/claude-3.5-sonnet
model now defaults to the updated version.
If you do not explicitly provide a model in your call()
, it will now default to the azure/gpt-4o-eu
model.
Opper now support two image generation models, azure/dall-e-3-eu
and gcp/imagen-3.0-generate-001-eu
. Here is an example of generating an image from a description in Python:
def generate_image(description: str) -> ImageOutput:
image, _ = opper.call(
name="generate_image",
output_type=ImageOutput,
input=description,
model="gcp/imagen-3.0-generate-001-eu",
configuration=CallConfiguration(
model_parameters={
"aspectRatio": "9:16",
}
),
)
return image
description = "portrait of a person standing in front of a park. vibrant, autumn colors"
path = save_file(generate_image(description).bytes)
print(path)
Here is a similar example in TypeScript:
async function testImageGeneration() {
const image = await client.generateImage({
model: "gcp/imagen-3.0-generate-001-eu",
prompt: "portrait of a person standing in front of a park. vibrant, autumn colors",
configuration: {
model_parameters: {
aspectRatio: "9:16",
}
}
});
const tempFilePath = path.join(os.tmpdir(), "image.png");
fs.writeFileSync(tempFilePath, image.bytes);
console.log(`image written to temporary file: ${tempFilePath}`);
}
testImageGeneration();
Model parameters vary between models, but here are the supported ones for each model:
azure/dall-e-3-eu
:
gcp/imagen-3.0-generate-001-eu
:
You are now able to pass images as input to multimodal models.
Python SDK
# special type for images, this is to capture the need for encoding the image in the right format
from opperai import ImageInput
description, response = await aopper.call(
name="async_describe_image",
instructions="Create a short description of the image",
output_type=Description,
input=Image(
image=ImageInput.from_path("examples/cat.png"),
),
model="openai/gpt-4o",
)
Node SDK
// special function to read images, this is to capture the need for encoding the image in the right format
import { opperImage } from "opperai";
const { message } = await client.call({
parent_span_uuid: trace.uuid,
name: "node-sdk/call/multimodal/image-input",
instructions: "Create a short description of the image",
input: {image: image("examples/cat.png")},
model: "openai/gpt-4o",
});
Using the ImageOutput
type you are now able to generate images via call
using DALL-E 3 in the Python SDK.
from opperai import ImageOutput
cat, _ = await aopper.call(
name="generate_cat",
output_type=ImageOutput,
input="Create an image of a cat",
)
Using the Node SDK you can generate images using DALL-E 3.
const cat = await client.generateImage({
parent_span_uuid: trace.uuid,
prompt: "Create an image of a cat",
});
See Cerebras for more information about these models.
The new default embedding model for indexes is text-embedding-3-large
.
You can now add examples at call time. This is useful if you have a set of examples that you want to use as a reference for your model without having to manage a dataset.
output, _ = opper.call(
name="changelog/python/call-with-examples",
instructions="extract the weekday from a text",
examples=[
Example(input="Today is Monday", output="Monday"),
Example(input="Friday is the best day of the week", output="Friday"),
Example(
input="Saturday is the second best day of the week", output="Saturday"
),
],
input="Wonder what day it is on Sunday",
)
Manually
span = opper.traces.start_trace(name="my_function", input="Hello, world!")
# business logic here
span.end()
Using context manager
with opper.traces.start(name="my_function", input="Hello, world!") as span:
# business logic here
Using the @trace
decorator
@trace
def my_function(input: str) -> str:
# business logic here
You can now call a LLM without explicitly creating a function.
opper.call(name="anthropic/claude-3-haiku", input="Hello, world!")
You can now manually trace using the Node SDK.
// Start parent trace
const trace = await client.traces.start({
name: "node-sdk/tracing-manual",
input: "Trace initialization",
});
// You can optionally start a child span and provide the input
const span = await trace.startSpan({
name: "node-sdk/tracing-manual/span",
input: "Some input given to the span",
});
// A metric and/or comment can be saved to the span
// A span generation can also be saved using .saveGeneration()
await span.saveMetric({
dimension: "accuracy",
score: 1,
comment: "This is a comment",
});
// End the span and provide the output
await span.end({
output: JSON.stringify({ foo: "bar" }),
});
// End the parent trace
await trace.end({ output: JSON.stringify({ foo: "bar" }) });
You can now call a LLM without explicitly creating a function.
const { message } = await client.call({
name: "node-sdk/call/basic",
input: "what is the capital of sweden",
});
You can now manually add generations to your traces. This is useful if you call an LLM outside of Opper but still want to use the tracing capabilities of Opper.
def run():
opper = Opper()
spans = opper.spans
with spans.start("transform", input="Hello, world!") as span:
t0 = datetime.now(timezone.utc)
manually_call_llm()
t1 = datetime.now(timezone.utc)
span.save_generation(
called_at=t0,
duration_ms=int((t1 - t0).total_seconds() * 1000),
response="I'm happy because I'm happy",
model="anthropic/claude-3-haiku",
messages=[
{
"role": "user",
"content": "Hello, world!",
}
],
cost=3.1,
prompt_tokens=10,
completion_tokens=10,
total_tokens=20,
)
We have added support for the just released GPT-4o mini model from OpenAI.
Projects allow you to create separation in Opper. Currently, the following is tied to a project:
When you create an API for a specific project, all usage will be associated with that specific project automatically, so there is no need to pass the project as you are using it.
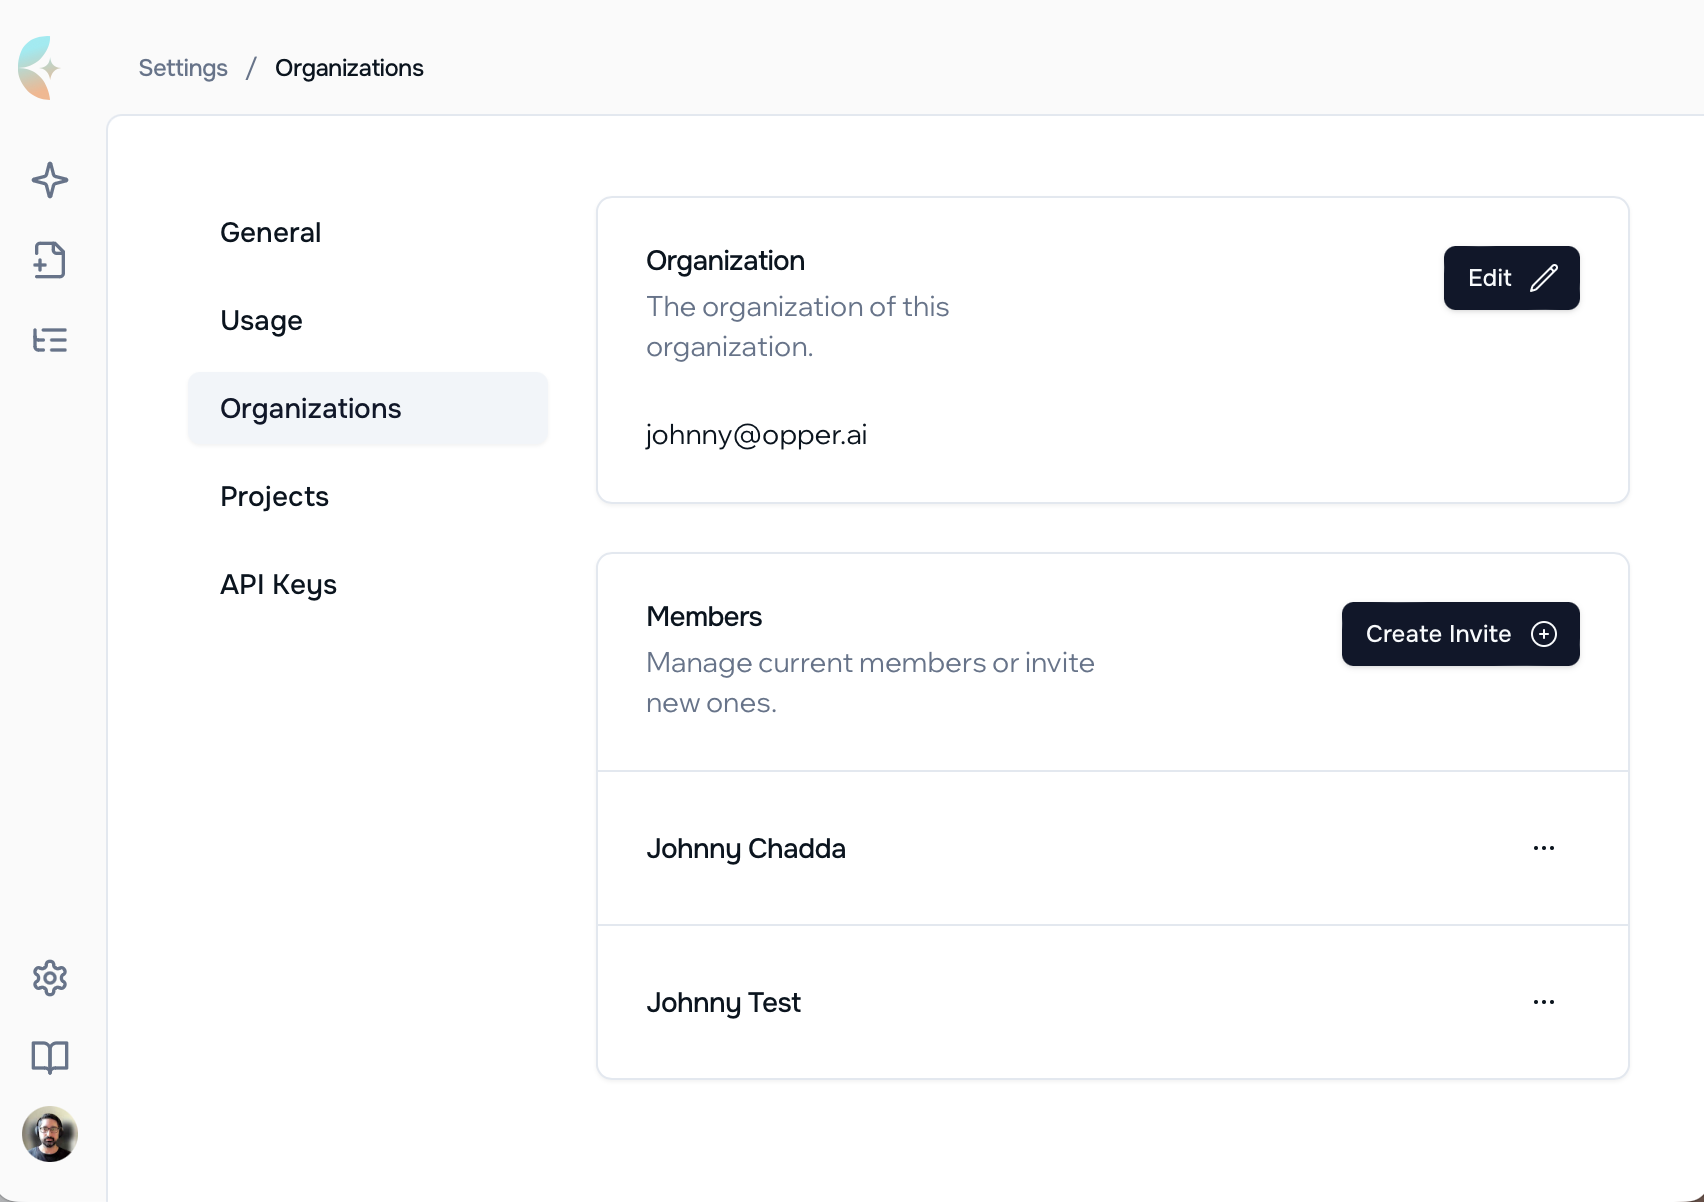
You are now able to create your own organizations in Opper. Go to Settings --> Organization and click Create Organization in the top right corner to get started.
Once you have created your organization, you are able to invite your colleagues by sending an invite to their email address. Once they are in, you are able to collaborate and have a common view of your AI usage.